Rotary Hammer Drill 40mm
October 26, 2018
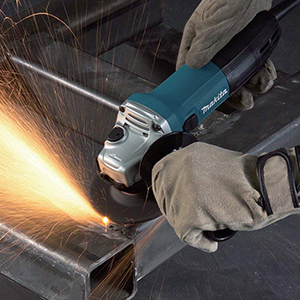
Small Grinder (Angle Grinder 115 & 125mm )
April 8, 2019Product Description
The mag base drill is a portable drilling machine with a permanent magnetic base. It is best suited for large and heavy work pieces which are difficult to move for making holes. They are portable and lightweight so they can be easily taken to the workpiece to be drilled. The strong magnetic base of the drill sticks to the metal surface to stabilize the drilling process.
These drill are often used in steel fabrication, building, construction, and many other applications where drilling stability might be required.
Product Specifications
Drill
- No Load Speed: 130-280 or 240-510rpm (two speed selector)
- Weight: 5.8kg
- Tool Holder: Morse Taper 3
- Input Volt: 220V
- Rated Input Power: 1600W
- Twist Drill Max. Capacity: 32mm
- Milling Max. Capacity: 50mm
Magnetic Base
- Dimension: 135mm(W) x 320mm(L) x 470mm(H)
- Weight: 17.25kg
- Voltage: 220V
- Magnetic Adhesion: 2050kg
Accessories
- Securing Chain
- Morse Taper Drift Key
- Metal Carry Case
Equipment normally on hire with this product
- Keyless Chuck MT3
- Morse Taper Sleeve MT3 to MT2
- Drill MT3 to 18mm Adaptor
- 20m Extension Lead
Operating Instructions
Pull the plug from the socket outlet before carrying out adjustments on the power tool or replacing accessory parts. Unintentional starting of drills is the cause of some accidents. After each adjustment on the drill stand, retighten the bolts and locking handles.
- Switching On and Off
- Switch the drill on and lock the On/Off switch of the drill with the lock-on button. Otherwise, the drill cannot be switched on or off via the motor On/Off switch on the drill stand.
Push the magnet On/Off switch upward and check if the drill stand adheres to the workpiece surface.
To start the drill, press the motor On/Off switch to position “I”. Note: The drill can only be started when the magnet has already been switched on.
To switch off the drill, press the motor On/Off switch to position “0”. Wait until the drill has come to a complete stop before pushing the magnet On/Off switch downward in order to switch the magnet off.
When not using the drill, switch it off in order to save energy.
- Gear selection, mechanical
- Actuate the gear selector only when the machine is at a standstill. Four speed ranges can be preselected with the gear selector. Press the gear selector down, slide it to the requested setting according to the gearing below and allow it to engage at the respective end position.
- 1st gear: Low speed range; for working with large drilling diameter.
- 2nd gear: Average speed range.
- 3rd gear: Average speed range.
- 4th gear: High speed range; for working with small drilling diameter.
If the gear selector cannot be slid to the stop, lightly rotate the drive spindle via the drill bit.
- Switching On and Off
To start the machine, press the On/Off switch and keep it pressed. To lock the pressed On/Off switch, press the lock-on button. To switch off the machine, release the On/Off switch or when it is locked with the lock-on button, briefly press the On/Off switch and then release it. To save energy, only switch the power tool on when using it.
- Working Advice
Use drilling lubricant or cutting oil for cooling and lubrication, and to avoid overheating or jamming of the drill bit. When drilling diameters >10 mm, drill a pilot hole with a small drilling diameter. This allows you to reduce the feed pressure and the power tool is strained less. For drilling in metal, use only perfectly sharpened HSS drill bits (HSS=high-speed steel). Prevents the workpiece from turning.
- Mounting the Safety Chain
For all work being performed in inclined, vertical or overhead positions, secure the drill stand against falling down with the provided safety chain. Before using the safety chain, check its proper function. Never use a damaged safety chain; replace a damaged safety chain immediately. Fasten the safety chain in such a manner that the drill stand moves away from you, should it come undone. Fasten the safety chain around the carrying handle of the drill stand with as little play as possible.
Safety Warnings
- Use auxiliary handle(s), if supplied with the tool. Loss of control can cause personal injury.
- Always be sure you have a firm footing.
- Be sure no one is below when using the tool in high locations.
- Keep hands away from moving parts.
- Do not leave the tool running. Operate the tool only when hand-held.
- Do not touch the bit or parts close to the bit immediately after operation; they may be extremely hot and could burn your skin.
- Switch off the power tool immediately when the tool insert jams. Be prepared for high reaction torque that can cause kickback. The tool insert jams when: the power tool is subject to overload or it becomes wedged in the work piece. Hold the machine with a firm grip.
- When working with the machine, always hold it firmly with both hands and provide for a secure stance. The power tool is guided more secure with both hands.
- Secure the work piece. A work piece clamped with clamping devices or in a vice is held more secure than by hand.
- Keep your workplace clean. Blends of materials are particularly dangerous. Dust from light alloys can burn or explode.
- Always wait until the machine has come to a complete stop before placing it down.
- Never use the machine with a damaged cable. Do not touch the damaged cable and pull the mains plug when the cable is damaged while working. Damaged cables increase the risk of an electric shock.
Safety Equipment suggested:
![]() Eye Protection
Eye Protection
All round protection: grade 1 goggles
Less hazardous work: grade 2 spectacles
![]() Ear Defenders
Ear Defenders
Protection against high noise levels. Earplugs are suitable for short-term work.
![]() Safety Footwear
Safety Footwear
Wear safety footwear for toe protection.
![]() Protective Gloves
Protective Gloves
Gauntlets, PVC, cotton or rigger gloves for hand protection.
Related products
-
Medium Duty Breaker (Makita HM1307C)
Add To Quote This product has multiple variants. The options may be chosen on the product page -
Cold Chisels
Add To Quote This product has multiple variants. The options may be chosen on the product page


