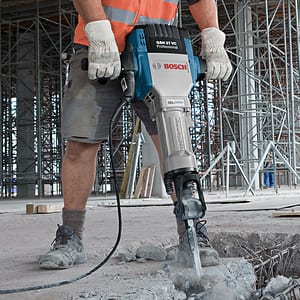
Heavy Duty Breaker
October 23, 2018
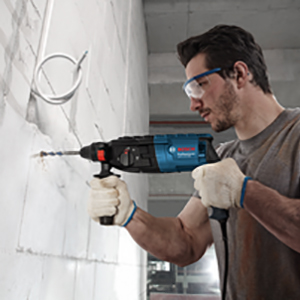
Rotaty Hammer Drill 20mm
October 26, 2018

Product Description
Whether you are drilling through wood, metal, plastic, brickwork or moderately soft masonry, these compact, electric drills are excellent all-rounders.
The Drill has an electronic control and right/left rotation and is therefore also suitable for screw driving and thread-cutting.
Product Specifications
- No Load Speed: 0-2800rpm
- Rated speed: 1750rpm
- Rated torque: 2.3Nm
- Impact frequency at no-load: 47600 min-1
- Weight: 1.9kg
- Chuck Clamping Range: 1.5 - 13mm
- Input Volt: 220V
- Rated Input Power: 750W
- Rated Output Power: 380W
- Max. drilling dia.
- concrete: 16mm
- wood: 30mm
- steel: 12mm
- masonry: 18mm
Accessories
- 13mm Chuck Key
Equipment normally on hire with this product
- 20m Extension Lead
Operating Instructions
Assembly - Before any work on the machine itself, pull the mains plug.
- Auxiliary Handle
Operate your machine only with the auxiliary handle
The auxiliary handle can be set to any position for a secure and low-fatigue working posture. Turn the bottom part of the auxiliary handle in a counter-clockwise direction and swivel the auxiliary handle to the desired position. Then retighten the bottom part of the auxiliary handle by turning in a clockwise direction.
- Adjusting the Drilling Depth
The required drilling depth can be set with the depth stop. Turn the bottom part of the auxiliary handle in an anticlockwise direction and insert the depth stop. Pull out the depth stop until the distance between the tip of the drill bit and the tip of the depth stop correspond with the desired drilling depth. Afterwards, tighten the bottom part of the auxiliary handle again by turning in a clockwise direction. The knurled surface of the depth stop must face upward.
- Changing the Tool - Keyless Chuck
The drill spindle is locked when the On/Off switch is not pressed. This makes quick, convenient and easy changing of the tool in the drill chuck possible. Open the keyless chuck by turning in rotation direction until the tool can be inserted. Insert the tool. Firmly tighten the collar of the keyless chuck by hand in rotation direction until the locking action (“click”) is no longer heard. This automatically locks the chuck. The locking is released again to remove the tool when the collar is turned in the opposite direction.
- Changing the Tool - Key Type Drill Chuck
Wear protective gloves when changing the tool. The drill chuck can become very hot during longer work periods. Open the key type drill chuck by turning until the tool can be inserted. Insert the tool. Insert the chuck key into the corresponding holes of the key type drill chuck and clamp the tool uniformly.
- Screwdriver Tools
When working with screwdriver bits, a universal bit holder should always be used. Use only screwdriver bits that fit the screw head. For driving screws, always position the “Drilling/Impact Drilling” selector switch to the “Drilling” symbol.
- Starting Operation
Observe correct mains voltage! The voltage of the power source must agree with the voltage specified on the nameplate of the machine. Power tools marked with 230 V can also be operated with 220 V.
- Reversing the Rotational Direction
Actuate the rotational direction switch only when the machine is at a standstill. The rotational direction switch is used to reverse the rotational direction of the machine. However, this is not possible with the On/Off switch actuated.
Right Rotation: For drilling and driving in screws, push the rotational direction switch upward on the left side and at the same time downward on the right side.
Left Rotation: For loosening and unscrewing screws and nuts, push the rotational direction switch downward on the left side and at the same time upward on the right side.
- Setting the Operating Mode
Drilling and Screw driving: Set the selector switch to the “Drilling” symbol.
Impact Drilling: Set the selector switch to the “Impact drilling” symbol.
The selector switch engages noticeably and can also be actuated with the machine running.
- Switching On and Off
To start the machine, press the On/Off switch and keep it pressed. To lock the pressed On/Off switch, press the lock-on button. To switch off the machine, release the On/Off switch or when it is locked with the lock-on button, briefly press the On/Off switch and then release it.
- Adjusting the Speed/Impact Frequency
The speed/impact rate of the switched on power tool can be variably adjusted, depending on how far the On/Off switch is pressed. Light pressure on the On/Off switch results in low speed/impact rate. Further pressure on the switch increases the speed/impact rate.
- Preselecting the Speed/Impact Frequency
With the thumbwheel for speed pre-selection, the required speed/impact frequency can be preselected even during operation. The required speed/impact frequency depends on the material and the working conditions, and can be determined through practical testing.
Safety Warnings
- Use auxiliary handle(s), if supplied with the tool. Loss of control can cause personal injury.
- Always be sure you have a firm footing.
- Be sure no one is below when using the tool in high locations.
- Keep hands away from moving parts.
- Do not leave the tool running. Operate the tool only when hand-held.
- Do not touch the bit or parts close to the bit immediately after operation; they may be extremely hot and could burn your skin.
- Wear ear protectors when impact drilling. Exposure to noise can cause hearing loss.
- Use appropriate detectors to determine if utility lines are hidden in the work area or call the local utility company for assistance. Contact with electric lines can lead to fire and electric shock. Damaging a gas line can lead to an explosion. Penetrating a water line causes property damage or may cause an electric shock.
- Switch off the power tool immediately when the tool insert jams. Be prepared for high reaction torque that can cause kickback. The tool insert jams when: the power tool is subject to overload or it becomes wedged in the work piece. Hold the machine with a firm grip. High reaction torque can briefly occur while driving in and loosening screws.
- When working with the machine, always hold it firmly with both hands and provide for a secure stance. The power tool is guided more secure with both hands.
- Secure the work piece. A work piece clamped with clamping devices or in a vice is held more secure than by hand.
- Keep your workplace clean. Blends of materials are particularly dangerous. Dust from light alloys can burn or explode.
- Always wait until the machine has come to a complete stop before placing it down. The tool insert can jam and lead to loss of control over the power tool.
- Never use the machine with a damaged cable. Do not touch the damaged cable and pull the mains plug when the cable is damaged while working. Damaged cables increase the risk of an electric shock.
Safety Equipment suggested:
![]() Eye Protection
Eye Protection
All round protection: grade 1 goggles
Less hazardous work: grade 2 spectacles
![]() Breathing Masks
Breathing Masks
Breathing mask levels
- General Purpose Disposable Masks
General purpose, disposable masks for low-risk dust and water-based airborne sprays. - Respiratory Disposable Masks
Respiratory disposable masks with a charcoal filter for welding fumes, ozone and most
nuisance level odours. - Consult Product Supplier
Consult product supplier for guidance and data information.
![]() Ear Defenders
Ear Defenders
Protection against high noise levels. Earplugs are suitable for short-term work.
![]() Safety Footwear
Safety Footwear
Wear safety footwear for toe protection.
![]() Protective Gloves
Protective Gloves
Gauntlets, PVC, cotton or rigger gloves for hand protection.
Related products
-
Light Duty Breaker / Concrete Chipper
Add To Quote This product has multiple variants. The options may be chosen on the product page -
Rotary Hammer Drill 40mm
Add To Quote This product has multiple variants. The options may be chosen on the product page -
Rotaty Hammer Drill 20mm
Add To Quote This product has multiple variants. The options may be chosen on the product page


