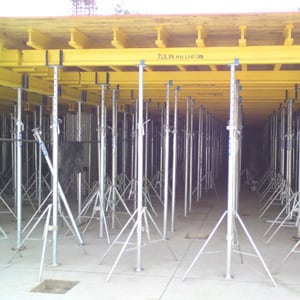
Quickstage Support Scaffold
August 31, 2017
H20 Beams
September 8, 2017Props & Accessories
Props are the fast and easy way to support formwork. Props eliminate the costly labour and time consumed in cutting timber to length, wedging and nailing.

Product Description
Props are the fast and easy way to support formwork. Props eliminate the costly labour and time consumed in cutting timber to length, wedging and nailing.
There are no loose parts to be mislaid or lost and the props are compact for storage and transport. Five sizes are available
Product Specifications
| Size No. | Closed Height | Extended Height | Maximum Safe Working Loads (kN) Closed | Maximum Safe Working Loads (kN) Extended | Maximum Safe Working Loads (kN) Extended & Laced | Weight (kg) |
| 0 | 1050 | 1800 | 29.00 | 29.00 | 29.00 | 13.00 |
| 1 | 1750 | 3120 | 29.00 | 19.58 | 29.00 | 20.00 |
| 2 | 1970 | 3350 | 29.00 | 16.86 | 29.00 | 21.00 |
| 3 | 2580 | 3960 | 29.00 | X | 29.00 | 23.00 |
| 4 | 3200 | 4870 | 29.00 | X | 24.00 | 28.13 |
Important
It should be noted that the maximum recommended working load for any prop is 29.00 kN regardless of potential supporting capacity above this load. This condition is introduced to avoid excessive force being required to operate the prop nut of very highly loaded props.
Lack of attention to the erection of props resulting in them not being vertical or eccentrically loaded or a combination of both conditions will result in a reduction of carrying capacity.
Accessories
- Universal Prop Tripod
- Prop Crosshead
- Prop U-Head Spigot
- H20 Beams
- Wooden Beams
Operating Instructions
- Insert Prop upright into Tripod at the required position.
- Then insert either a Crosshead or U-Head Spigot as required into the top of the Prop.
- Extend the Prop inner to the required height and insert the pin.
- Ensure locating pin is inserted fully.
- Do the same with another Prop and Tripod parallel to the first prop at the required position.
- The space in-between the two Props should be adequate for the H20 Beam to be placed into the Crosshead or U-Head Spigot
- Place the primary H20 Beam across the Props by inserting it into the Crosshead or U-Head Spigot.
- Turn the Prop nut of the first Prop until the exact height is reached and then turn the second Prop nut until the H20 Beam is level.
- This can then be repeated across the area that will be supported as required.
- Secondary H20 beams can then be placed over the primary H20 Beams. See H20 Beam Specifications for distances between beams.
Safety
![]() Safety Footwear
Safety Footwear
Wear safety footwear for toe protection.
![]() Protective Gloves
Protective Gloves
Gauntlets, PVC, cotton or rigger gloves for hand protection.
![]() Safety Helmets
Safety Helmets
Protect against falling objects. Compulsory on site. Bump caps protect from overhead obstacles.
Related products
-
Ferrules & Ferrule Jack
Add To Quote This product has multiple variants. The options may be chosen on the product page -
Round Column Formwork
Add To Quote This product has multiple variants. The options may be chosen on the product page -
H20 Beams
Add To Quote This product has multiple variants. The options may be chosen on the product page


